You can generate different types of content archive, administrative, and workflow relevant reports as follows:
- In View view, go to Document Navigator and click on Report menu icon and select New Report.
- A new window opens for a multi-step wizard. In the first step, you need to select the type of the report to be generated. This step is split into five tabs: Recent Reports, Administrator Reports, Content Reports, User Templates, and Organization Templates.
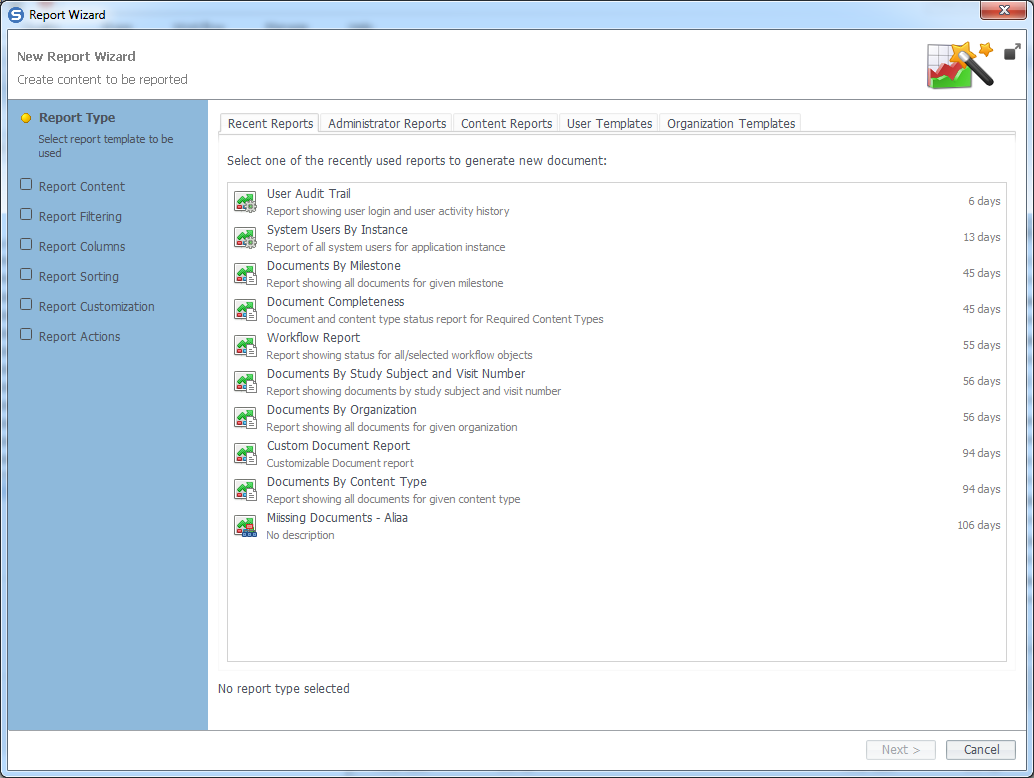
- Recent Reports tab: displays the list of report types recently generated. For example, if you have recently generated Documents by Organization report type, you will see this report type in this tab.
- Administrative Reports tab: allows generating administration relevant reports. Supported report types are:
- Barcode Cover Sheet: Lists barcode cover sheets used in documents for selected Content Types in different clinical studies.
- Organizations By Archive: Lists information about all Organizations in different clinical studies.
- Persons By Archive: Includes information about selected Persons in different clinical studies.
- Signing Audit Trail Report: Lists information about users' signing events.
- System User Report: Lists information about all system users who are using SureClinical.
- Training Certificate: Lists information about all system users' signed and unsigned training certificates.
- User Audit Trail: Shows users' activity history (e.g., login, logout, modifying metadata properties, etc).
- Content Reports tab: allows generating different types of reports according to specific document related criteria:
- Audit Report: This report lists information about audit sample lists generated for different studies (for study auditing purposes).
- Content Model: This report type lists information regarding a selected content model.
- Custom Document Report: This report type enables user to generate a customized document status report with user-defined columns and user-defined data sorting.
- Discrepancy Report: The generated report lists information about reported document discrepancy issues.
- Document Completeness: This report type lists all content types and missing documents.
- Documents by Content Type: Shows information about documents for selected Content Types in different clinical studies.
- Documents by Milestone: This report type uses Content Type 'Required by Date' setting to generate a basic chart report that indicates which documents have been collected for a specific person, role, organization or group for a Content Type.
- Documents by Organization: Provides details about documents for selected Organizations in different clinical studies.
- Documents by Organization Role: Lists information about documents related to selected Organization Roles in different clinical studies.
- Documents by Person: Lists information about documents related to selected Persons in different clinical studies.
- Documents by Person Role: Lists information about documents related to selected Person Roles in different clinical studies.
- Documents by Study Site: Lists information about all documents related to selected study sites.
- Documents by Study Subject and Visit Number: Shows information about documents by Study Subject and Visit Number.
- Expiring Document Report: Lists information about documents expiring in 30 days time.
- Incomplete Workflow Report: Lists information about incomplete (or unfinished) workflow processes.
- Missing Documents: Lists information about missing documents, those required to be uploaded, for required Content Types.
- Quality Compliance: Lists the status of documents for Content Types with Required status in selected Classification Categories in different clinical studies.
- Signature Validation Report: Lists information about signing events for all system users (e.g., signing date, reason for signing, IP address from which the document was signed, etc.)
- Workflow Report: This report type lists the status of all (or selected) workflow processes.
- User Templates tab: lists all user templates generated by the current logged in user. By default all templates are generated as user templates unless the logged in user promotes them to become visible to all users within a specific study.
- Organization Templates tab: lists all templates shared with users within specific studies. This tab shows for each template its report type and studies in which this template is visible.
- After you have selected the report type, click Next to move to the next step.
- Select the content to be used in the generated report. The content that can be used in report generation varies according to the report type. If you have selected a template, this step will be automatically filled with saved selected content. Click Next to move to the next step.
- This step allows report filtering where you can further filter content to be added to the report. Refer to Report Filtering help topic for further details. Click Next to move to the next step.
- In this step, select columns to be included in the generated report. Note that, some report types give you the option to select columns to be included in the report, while others have a set of predefined columns that cannot be changed. To select a column, drag its relevant field from left to right(as shown in the image below). The order of columns in the report is the same as that for columns in the right panel. To change this order, select a field and drag it up or down. After you finish selection, click Next to move to the next step.

- In this step, you can optionally specify the order by which data is sorted in columns. For example, you may wish to sort data in your report by Organization first. You can do so by dragging columns, used in sorting, from left to right (as shown in the image below) and change the sort order priority by moving selected fields in the right up and down. After you finish order selection, click Next to move to the next step.

- In this step, you can set report properties, including report orientation and paper size. If the report includes too many columns, you can optionally set Auto Fit Width to automatically adjust report's width and Condense Report Output. However, the generated report may not fit in a printed paper. Click Next to move to the next and final step.
- In this step, you can select to email the generated report, save the generated report as a template, and/or open the generated report in Document Viewer after its creation. If you want to send the generated report in an email, check the option Send report by email as an attachment, add message body (if required) to Email Content, and add contacts or emails for users who will receive the report sent. The report is sent as an email attachment in PDF format. Click Finish to generate the required report.
Comments