SureDrive is a free form folder hierarchy that allows storing folders and documents on the SureClinical cloud. SureDrive allows creating a simple file folder structure without following the rigid rules for the Oasis eTMF content model. To create SureDrive:
| 1 |
Go to S-Button Menu > Study > New SureDrive. The New SureDrive Wizard pops up. The first step in this wizard provides brief information about what the wizard will do. Click Next to move to the next step of the wizard.
|
|
| 2 |
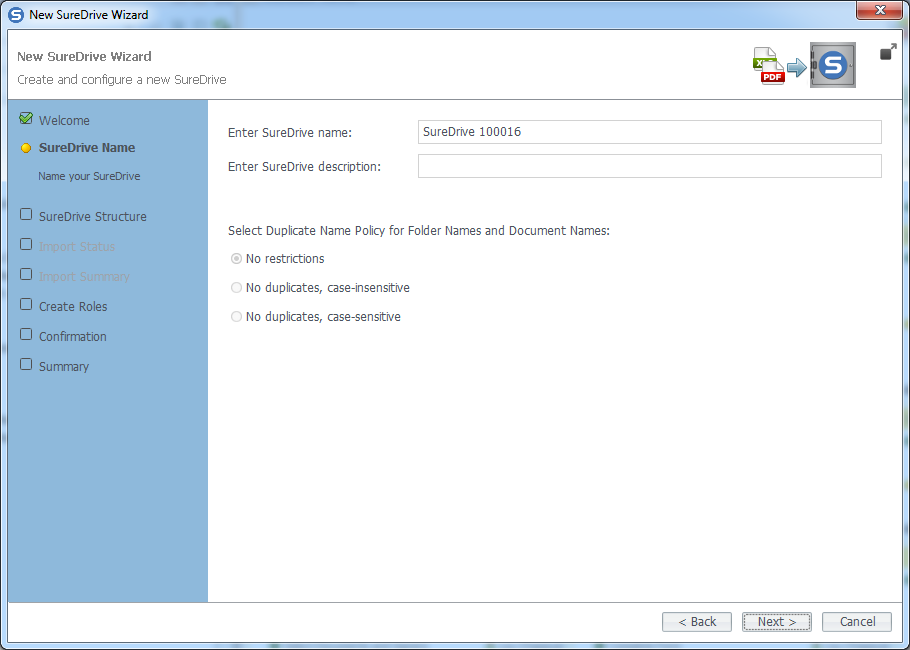
Enter SureDrive name, an optional description and specify the duplicate naming policy for duplicate folders and files. Supported naming policies are: No restrictions (allow duplicates for folders and files), No duplicates, case insensitive (does not distinguish between upper and lower case letters), and No duplicates, case sensitive. Click Next to move to the next step of the wizard. |
 |
| 3 |
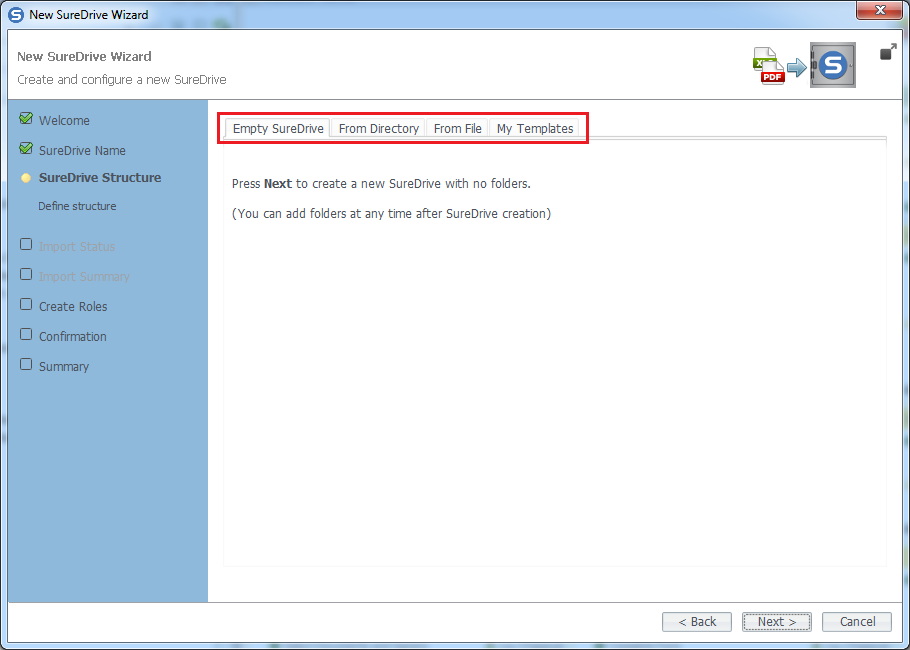
In this step you specify the SureDrive structure. You can create SureDrive with no folders and add them later (Empty SureDrive tab), or select local folder by drag and drop or browsing your local machine (From Directory tab). You can also create the SureDrive structure from an XLS file selected locally from your machine (From File tab), or finally using the template of an existing SureDrive or Study (My Templates tab). Specify the source then click Next. |
 |
| 4 |
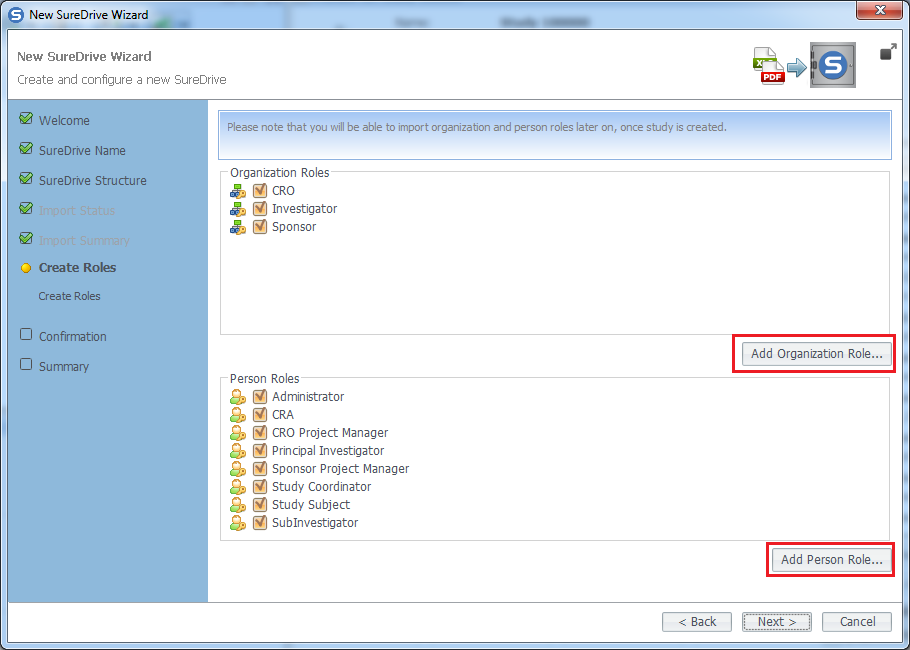
Create Organization and Person roles in this step by selecting the default roles you wish to include. You can also add Organization and Person roles by clicking Add Organization Role and Add Person Role. Click Next to move to the next step of the wizard. |
 |
| 5 |
Confirm the SureDrive folder structure, data properties, and annotations then click Create SureDrive. You will see a notification message informing you that the creation of a new SureDrive might result in charges to your account if not terminated within 30 days. To proceed into creating SureDrive click Ok. |
|
| 6 |
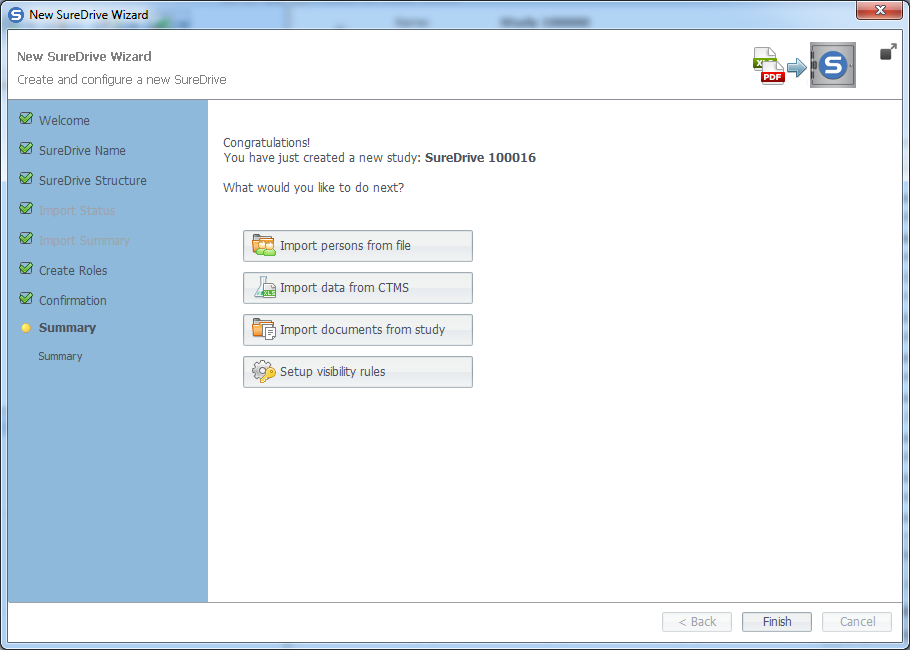
After you have successfully created your SureDrive, the final step of the wizard provides a number of suggested operations to do next: Import Persons from file, Import Data from CTMS, Import documents from Study, and setup content visibility rules. Conclude the wizard by clicking Finish. |
 |


Comments